Cloud Enablement for CAD Applications
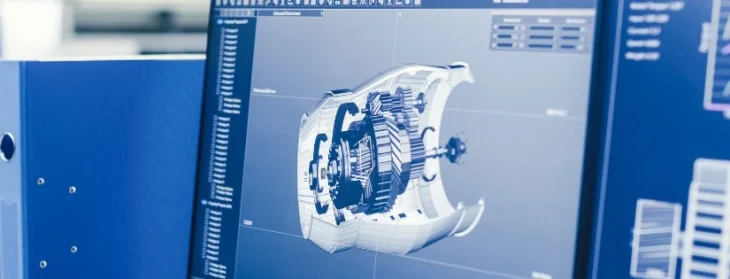
Table of content Current State of Cloud-based CAD Technological Issues with CAD on the Cloud Adoption Issues Way Forward Over the last decade, multiple manufacturing-related applications have moved to the cloud to reduce hardware investments and to avail of the benefits of IT resource aggregation. CAD, which plays a crucial role in product development, is often considered a potential candidate for cloud enablement. As CAD software consumes dedicated high-end compute and graphics resources, a definite business case exists to move CAD on cloud. Moving CAD on cloud can bring multiple benefits like increased flexibility, better collaboration, and ultimately reduced cost of hardware and maintenance. AutoCad Cloud is one such example of cloud-based CAD platform which enables creating, editing, viewing, and sharing drawings without having to install it on your system. Almost all CAD ISVs are considering some form of cloud enablement, but it has not picked the pace for multiple reasons. The following sections discuss these issues and possibly how they will evolve. Current State of Cloud-based CAD Cloud has popularized the on-demand access to resources and usage-based charges. It has helped the customers to transition the cash flow from an upfront fixed cost to a variable cost. Almost all types of software can now be licensed in this model. CAD software ISVs are following this trend by shifting from perpetual license + AMC to an annual subscription model with support. For the cloud, adoption evolution can be seen in all three types of cloud adoption – IaaS, PaaS, and SaaS. There are visible progressions in each type, and a few ready solutions are already available in the market. However, there remain technology hurdles and user adoption issues. Technological Issues with CAD on the Cloud Moving CAD on cloud requires some critical pieces to be recreated to suit the cloud architecture. It would take a significant effort to redevelop these pieces and bring them to par with current levels. CAD ISVs strive to address the above and many other technical issues, with few breakthroughs. However, user adoption is still low due to various process-related issues. Adoption Issues CAD Applications have been used by various product development OEMs and their suppliers for over a quarter century. These organizations have evolved custom workflows and security processes around CAD. Moving to cloud-based CAD will need multiple adjustments to these processes, which could be a significant hurdle in adoption. In addition to the above points, there are factors like usability due to latency issues and significant concerns of the customers in the form of vendor lock-in. These have been discussed at many forums, hence not elaborated here. Way forward As cloud technology advances, some challenges could get addressed or become irrelevant. However, looking at the overall picture, cloud adoption is likely to evolve on two fronts –
Read MoreWhat is Mesh and what are the types of Meshing
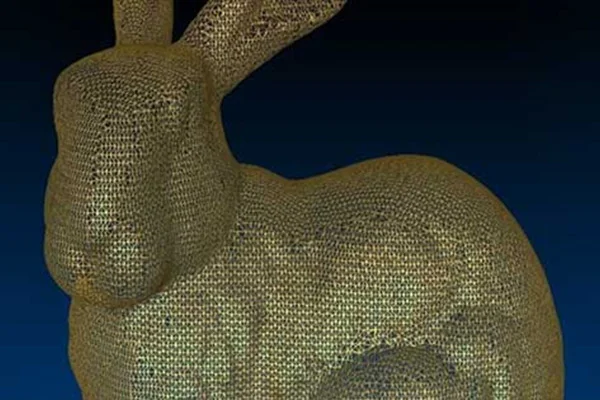
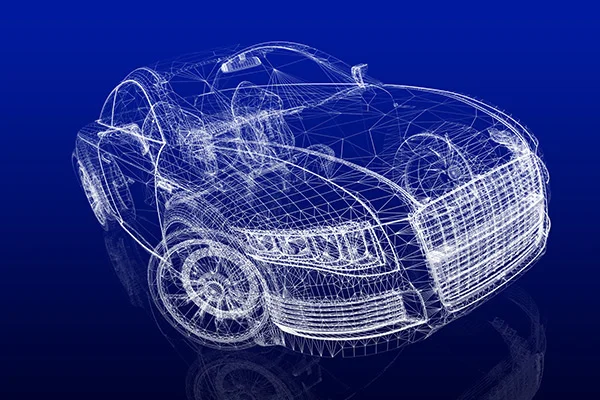
Table of content Types of Meshing Types of Meshing as per Grid Structure For those acquainted with mechanical design and reverse engineering, they can testify to the fact that the road to a new product design involves several steps. In reverse engineering, the summary of the entire process involves scanning, point cloud generation, meshing, computer-aided designing, prototyping and final production. This section covers a very crucial part of the process — Meshing or simply put, Mesh. To put a simple definition, a mesh is a network that constitutes of cells and points. Mesh generation is the practice of converting the given set of points into a consistent polygonal model that generates vertices, edges and faces that only meet at shared edges. It can have almost any shape in any size. Each cell of the mesh represents an individual solution, which when combined, results in a solution for the entire mesh. Mesh is formed of facets which are connected to each other topologically. The topology is created using following entities: These include: Types of Meshing Meshes are commonly classified into two divisions, Surface mesh and Solid mesh. Let us go through each section one by one. Surface MeshA surface mesh is a representation of each individual surface constituting a volume mesh. It consists of faces (triangles) and vertices. Depending on the pre-processing software package, feature curves may be included as well. Generally, a surface mesh should not have free edges and the edges should not be shared by two triangles. The surface should ideally contain the following qualities of triangle faces: The surface mesh generation process should be considered carefully. It has a direct influence on the quality of the resulting volume mesh and the effort it takes to get to this step. Solid Mesh Solid mesh, also known as volume mesh, is a polygonal representation of the interior volume of an object. There are three different types of meshing models that can be used to generate a volume mesh from a well prepared surface mesh. The three types of meshing models are as follows: Once the volume mesh has been built, it can be checked for errors and exported to other packages if desired. Types of Meshing as per Grid Structure A grid is a cuboid that covers entire mesh under consideration. Grid mainly helps in fast neighbor manipulation for a seed point. Meshes can be classified into two divisions from the grid perspective, namely Structured and Unstructured mesh. Let us have a look at each of these types. Structured Mesh Structured meshes are meshes which exhibits a well-known pattern in which the cells are arranged. As the cells are in a particular order, the topology of such mesh is regular. Such meshes enable easy identification of neighboring cells and points, because of their formation and structure. Structured meshes are applied over rectangular, elliptical, spherical coordinate systems, thus forming a regular grid. Structured meshes are often used in CFD. Unstructured Mesh Unstructured meshes, as the name suggests, are more general and can randomly form any geometry shape. Unlike structured meshes, the connectivity pattern is not fixed hence unstructured meshes do not follow a uniform pattern. However, unstructured meshes are more flexible. Unstructured meshes are generally used in complex mechanical engineering projects. Get access to our mesh tools library today Mesh Tools library offers a comprehensive set of operation for meshes for all your needs. Developed in C++, this library can be easily integrated in to your product. To learn more,
Read MorePoint Cloud Operations
No output is always perfect no matter how much the technology has evolved. Even though point cloud generation has eased up manufacturing process, it comes with its own anomaly. Generally, a point cloud data is accompanied by Noises and Outliers. Noises or Noisy data means the data information is contaminated by unwanted information; such unwanted information contributes to the impurity of the data while the underlying information still dominates. A noisy point cloud data can be filtered and the noise can be absolutely discarded to produce a much refined result. If we carefully examine the image below, it illustrates a point cloud data with noises. The surface area is usually filled with extra features which can be eliminated. After carrying out Noise Reduction process, the image below illustrates the outcome, which a lot smoother data without any unwanted elements. There are many algorithms and processes for noise reduction. Outlier, on the contrary, is a type of data which is not totally meaningless, but might turn out to be of interest. Outlier is a data value that differs considerably from the main set of data. It is mostly different from the existing group. Unlike noises, outliers are not removed outright but rather, it is put under analysis sometimes. The images below clearly portray what outliers are and how the point cloud data looks like once the outliers are removed. Point Cloud Decimation We have learned how a point cloud data obtained comes with noise and outliers and the methods to reduce them to make the data more executable for meshing. Point cloud data undergoes several operations to treat the anomalies existing within. Two of the commonly used operations are Point Cloud Decimation and Point Cloud Registration. A point cloud data consists of millions of small points, sometimes even more than what is necessary. Decimation is the process of discarding points from the data to improve performance and reduce usage of disk. Decimate point cloud command reduces the size of point clouds. The following example shows how a point cloud underwent decimation to reduce the excess points. Point Cloud Registration Scanning a commodity is not a one step process. A lot of time, scanning needs to be done separately from different angles to get views. Each of the acquired data view is called a dataset. Every dataset obtained from different views needs to be aligned together into a single point cloud data model, so that subsequent processing steps can be applied. The process of aligning various 3D point cloud data views into a complete point cloud model is known as registration. The purpose is to find the relative positions and orientations of the separately acquired views, such that the intersecting regions between them overlap perfectly. Take a look at the example given below. The car door data sets have been merged to get a complete model.
Read MorePoint Clouds | Point cloud formats and issues
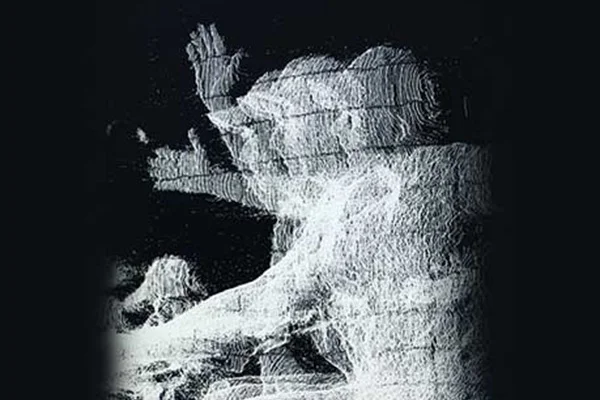
Table of content Different 3D point cloud file formats Challenges with point cloud data Whether working on a renovation project or making information data about an as-built situation, it is understandable that the amount of time and energy spent analyzing the object/project can be pretty debilitating. Technical literature over the years has come up with several methods to make a precise approach. But inarguably, the most prominent method is the application of Point Clouds. 3D scanners gather point measurements from real-world objects or photos for a point cloud that can be translated to a 3D mesh or CAD model. But what is a Point Cloud? A standard definition of point clouds would be – A point cloud collection of data points defined by a given coordinates system. In a 3D coordinates system, for example, a point cloud may determine the shape of some real or created physical system. Point clouds are used to create 3D meshes and other models used in 3D modeling for various fields, including medical imaging, architecture, 3D printing, manufacturing, 3D gaming, and various virtual reality (VR) applications. When taken together, a point is identified by three coordinates that correlate to a precise point in space relative to the end of origin. Different 3D point cloud file formats Scanning a space or an object and bringing it into designated software lets us manipulate the scans further, and stitch them together, which can be exported to be converted into a 3D model. Now there are numerous file formats for 3D modeling. Different scanners yield raw data in different formats. One needs other processing software for such files, and each & every software has its exporting capabilities. Most software systems are designed to receive a large number of file formats and have flexible export options. This section will walk you through some known and commonly used file formats. Securing the data in these common formats enables using different software for processing without approaching a third-party converter. Standard point cloud file formatsOBJ: It is a simple data format that only represents 3D geometry, color, and texture. And this format has been adopted by a wide range of 3D graphics applications. It is commonly ASCII (American Standard Code for Information Interchange). ASCII is a rooted language based on a binary that conveys information using text. Standard ASCII represents each character as a 7-bit binary number. In reverse engineering, characters are the focus of data. E57: E57 is a compact and widely used open, vendor-neutral file format for point clouds, and it can also be used to store images and data produced by laser scanners and other 3D imaging systems. Its compact, binary-based format combines the speed and accessibility of ASCII with the precision and accuracy of binary. E57 files can also represent normals, colors, and scalar field intensity. However, E57 is not universally compatible across all software platforms. PLY: The full form of PLY is the polygon file format. PLY was built to store 3D data. It uses lists of nominally flat polygons to represent objects. The aim is to store a more significant number of physical elements. It makes the file format capable of representing transparency, color, texture, coordinates, and data confidence values. It is found in ASCII and binary versions. PTS, PTX & XYZ: These three formats are familiar and compatible with most BIM software. It conveys data in lines of text. They can be easily converted and manipulated. PCG, RCS & RCP: These three formats were developed by Autodesk to meet their software suite’s demands. RCS and RCP are relatively newer. Binary point cloud file formats are better than ASCII or repurposed file types. It is because the latter is more universal and has better long-term storage capabilities. However, this type of format can be used to create a backup of the original data. If you need to convert binary point cloud files to ASCII, back up your binary files before reformatting them. This way, you can restore your data if something goes wrong. Challenges with point cloud data In reverse engineering, you may encounter several Point Cloud issues. The laser scanning procedure has catapulted product design technology to new heights. 3D data capturing system has come a long way, and we can see where it’s headed. As more and more professionals and end users are using new devices, the scanner market is rising at a quick pace. But along with a positive market change, handling and controlling the data available becomes a vital issue. These problems can result in poor quality point cloud data. Read on to learn more about five key challenges professionals working with point cloud face are: Data Quality: You must identify the quality issues in reverse engineering point cloud data. Reconstruction algorithms differ in their behavior based on the properties of point clouds. Many studies have classified the properties of point clouds by their effect on algorithms. The quality of point clouds affects the precision of the reconstructions. Point clouds produced by body scanners typically contain many duplicated and overlapping patches. These features cause a large amount of noise and redundancy in the final data. Reconstruction of free-form surfaces requires the use of clean-up meshes. This data must be transformed into a model that is consistent and accurate. Fortunately, this task is possible with the help of cloud-to-cloud alignment tools. Data Format: New devices out there in the market yield back data in a new form. Often, one needs to bring together data in different formats from different devices against a compatible software tool. It presents a not-so-easy situation. Identifying the wrong point cloud file format in reverse engineering is of great importance. Often when a company attempts to perform reverse engineering, it will be presented with a point cloud file in the wrong format. It can cause problems because the data is not in the correct format. EMPA has made it their business to work with point clouds as soon as possible. However, this doesn’t mean that you should give up
Read MoreTypes & Benefits of 3D Scanners and 3D Scanning Technologies
Table of content 3D Scanning Technology Types of scanners Benefits of 3D Laser Scanners As we have seen during the introduction, the first step to reverse engineering a product is through scanning with the help of 3D scanners. Early eras have seen the painstaking task of obtaining dimensions of an existing product. These methods were time-consuming and needed attention to detail from the first stage. However, with the rapid development in the scanning technology, the inception of a product has caught speed, and the chances of errors have reduced dramatically, making 3D scanning and measurement a vital part, starting from the design stage to the inspection stage. 3D laser scanning is the technology to capture a physical object’s exact size and shape using a laser beam to create a digital 3-dimensional representation of the same. 3D laser scanners produce “point clouds” of data from the surface of an object. 3D Scanning Technology 3D laser scanning efficiently takes the measurements of contoured surfaces and complex geometries, requiring vast amounts of data for accurate description. Doing this using traditional measurement methods is impractical and time-consuming. Acquiring sizes and dimensions of free-form shapes creates precise point cloud data. The basic working principle of a 3D scanner is to collect an entity’s data. It can either be:an object In reverse engineering, a laser scanner’s primary aim is to provide a lot of information about the design of an object which in the later stages gets converted to 3D CAD models, considering the compatibility of 3D scans and Computer Aided Design (CAD) software. 3D scans are even compatible with 3D printing, requiring specific computer software.3D scanning technologies vary with different physical principles and can be classified as follows:Laser triangulation 3D scanning technology: In this category, the laser scanner projects a laser beam on a surface and measures the deformation of the laser ray. Structured light 3D scanning technology: This technology involves projecting structured patterns of light on an object and acquiring a surface’s shape by measuring the light pattern’s deformation. Photogrammetric technology: It is also known as a 3D scan from photography. It reconstructs an object from 2D to 3D and has specific computational geometrical algorithms for the task. Photogrammetry is cheap, precise, and used to scan large objects such as buildings and stadiums.Photogrammetric technology Laser pulse 3D scanning technology: This unique process collects geometrical information by evaluating the time a laser beam takes to travel between its emission and reception. Computerized Tomography (CT scan): A widely used technique in the medical sector, CT scan is generally used to scan images of the human interiors. CT scans consist of scanning a part and taking a series of 2D images of various sections with X-rays. The 2D images are later superimposed on each other to imitate a 3D model. Contact-based 3D scanning technology: This process requires contact between the probe and the object, where the probe is moved firmly over the surface to acquire data. Types of scanners Apart from scanning technologies, there are various types of 3D scanners. Some are built for short- range scanning, while others are ideal for medium or long-range scanning. The building and usage of specific scanners hugely depend upon the object’s size to be scanned. The scanners for measuring small things vastly differ from those used for large-bodied objects, such as ships. Here is a summary of the types of 3D laser Scanners: Short Range 3D scanners: Short Range 3D scanners utilize either a Laser triangulation technology or Structured Light technology. Laser-based 3D scanners: These scanners employ trigonometric triangulation to capture a 3D object as millions of points. Laser scanners work by projecting a laser beam or multiple laser beams on an object and capturing its reflection with sensors located at a fixed distance from the scanners. Laser scanners come in various designs such as handheld portable units, arm-based, CMM-based, long-range, and single-point long-range trackers. Structured light 3D scanners: These are also known as white light scanners. However, most structured scanners use blue or white LED lights. The light pattern usually consists of a geometrical shape such as a bar, block, or other shape projected onto the object. The sensors consider the edge of the pattern to determine the 3D shape of the object. Blue or white light scanners are generally used to obtain outward dimensions. Medium and Long range scanners: Long-range 3D scanners are used for large objects such as buildings, ships, aircraft, and military vehicles. These scanners rotate and spin a mirror which reflects the laser outward towards the thing or areas to be 3D scanned. Arm-based scanners: Arm-based scanners are handy when measuring small minor parts, as they can be maneuvered by attaching them to the arm and is generally portable. Benefits of 3D Laser Scanners 3D scanners have contributed a lot over the years; needless to say; they come up with many benefits. Some of them are as follows:Able to scan harsh surfaces, such as shiny or dark finishes.This is strictly for handheld or other portable scanners. But given their importance, it is safe to say that the portability of scanners has played a significant role in easing up engineering.The scanning technology has enabled it to capture millions of points in less time.Scanners are less sensitive to changing light conditions and ambient light.Scanning of complex contours and geometrical figures has become more convenient with the invention of groundbreaking scanning technologies.Laser scanners have become so diverse that they are produced depending upon various projects or the objects to be scanned. The right place for your reverse engineering solutions Whether it is scanning or point cloud generation or meshing or 3D model creation, our engineers have been thoroughly trained in end-to-end reverse engineering.
Read MoreMesh – List of operations
Good cell quality of meshes translate into accurate results within optimum time after computation. But more often than not, we get a mesh output, which is far from accuracy. There are number of factors affecting a mesh, that might compromise with the final result. This chapter focuses on the various shortcomings of a mesh and their repair algorithms. Mesh Decimation/Simplification Mesh decimation/simplification is the method of reducing the number of elements used in a mesh while maintaining the overall shape, volume and boundaries preserved as much as possible. It is a type of algorithm that aims to transform a given mesh into another with fewer elements (faces, edges and vertices). The decimation process usually involves a set of user-defined quality criteria, that maintains specific properties of the original mesh as much as possible. This process reduces the complexity of a mesh. Mesh Hole-Filling To analyze a mesh model, it must be complete. Often, some mesh models carry holes in them, which must be filled. The unseen areas of the model appear as holes, which are aesthetically unsatisfying and can be a hindrance to algorithms that expect a continues mesh. The Fill Hole command fills the holes and gaps in the mesh. Note – The Fill Hole command only works on triangulated mesh and not tetrahedral mesh Mesh Refinement Certain situations arise which makes us concerned about the accuracy a model in certain areas. Such scenarios prompt us to have fine mesh in those areas to ensure accurate results. However, creating a surface mesh of the entire model with a fine mesh size may ask for unnecessary hours to analyze the fine mesh in those regions where the results are not as important to you. The answer to this issue is the usage of refinement points. A refinement point identifies a region or volume of space in which a finer mesh has to be generated. Mesh refinement can be defined by identifying an absolute size for the local mesh. Mesh refinement ends up in creating more number of elements in the specified region of the model. Mesh Smoothing Mesh smoothing is also known as mesh relaxation. Sometimes it is necessary to modify that mesh after a mesh generation. It is achieved either by changing the positions of the nodes or by removing the mesh altogether. Mesh smoothing results in the modification of mesh point positions, while the topology remains as it is.
Read MoreMesh Generation Algorithms
Table of content FAQs Algorithm methods for Quadrilateral or Hexahedral Mesh Algorithm methods for Triangular and Tetrahedral Mesh Mesh is the various aspects upon which a mesh can be classified. Mesh generation requires expertise in the areas of meshing algorithms, geometric design, computational geometry, computational physics, numerical analysis, scientific visualization, and software engineering to create a mesh tool. FAQs Over the years, mesh generation technology has evolved shoulder to shoulder with increasing hardware capability. Even with fully automatic mesh generators, there are many cases where the solution time is less than the meshing time. Meshing can be used for a wide array of applications; however, the principal application of interest is the finite element method. Surface domains are divided into triangular or quadrilateral elements, while volume domain is divided mainly into tetrahedral or hexahedral elements. A meshing algorithm can ideally define the shape and distribution of the elements. A vital step of the finite element method for numerical computation is mesh generation algorithms. A given domain is to be partitioned into simpler ‘elements.’ There should be a few elements, but some domain portions may need small elements to make the computation more accurate. All elements should be ‘well-shaped.’ Let us walk through different meshing algorithms based on two common domains: quadrilateral/hexahedral mesh and triangle/tetrahedral mesh. Algorithm methods for Quadrilateral or Hexahedral Mesh Grid-Based MethodThe grid-based method involves the following steps: Medial Axis MethodThe medial axis method involves an initial decomposition of the volumes. The technique involves a few steps as given below: Plastering methodPlastering is the process in which elements are placed, starting with the boundaries and advancing towards the center of the volume. The steps of this method are as follows: Whisker Weaving MethodWhisker weaving is based on the spatial twist continuum (STC) concept. The STC is the dual of the hexahedral mesh, represented by an arrangement of intersecting surfaces that bisects hexahedral elements in each direction. The whisker weaving algorithm can be explained in the following steps: Paving MethodThe paving method has the following steps to generate a quadrilateral mesh: Mapping Mesh MethodThe Mapped method for quad mesh generation involves the following steps: Algorithm methods for Triangular and Tetrahedral MeshQuadtree Mesh MethodThe quadtree mesh method recursively subdivided a square containing the geometric model until the desired resolution is reached. The steps for two-dimensional quadtree decomposition of a model are as follows: Delaunay Triangulation MethodA Delaunay triangulation for a set P of discrete points in the plane is a triangulation DT such that no points in P are inside the circum-circle of any triangles in DT. The steps of construction Delaunay triangulation are as follows: Delaunay Triangulation maximizes the minimum angle of all the triangle angles and tends to avoid skinny triangles. Advancing Front MethodAnother famous family of triangular and tetrahedral mesh generation algorithms is the advancing front or moving front method. The mesh generation process is explained in the following steps: Spatial Decomposition MethodThe steps for the spatial decomposition method are as follows: Sphere Packing MethodThe sphere packing method follows the given steps: Get access to our mesh tools library today Mesh Tools library offers a comprehensive set of operation for meshes for all your needs. Developed in C++, this library can be easily integrated in to your product. To learn more,
Read MoreMesh Quality
The quality of a mesh plays a significant role in the accuracy and stability of the numerical computation. Regardless of the type of mesh used in your domain, checking the quality of your mesh is a must. The ‘good meshes’ are the ones that produce results with fairly acceptable level of accuracy, considering that all other inputs to the model are accurate. While evaluating whether the quality of the mesh is sufficient for the problem under modeling, it is important to consider attributes such as mesh element distribution, cell shape, smoothness, and flow-field dependency. Element Distribution It is known that meshes are made of elements (vertices, edges and faces). The extent, to which the noticeable features such as shear layers, separated regions, shock waves, boundary layers, and mixing zones are resolved, relies on the density and distribution of mesh elements. In certain cases, critical regions with poor resolution can dramatically affect results. For example, the prediction of separation due to an adverse pressure gradient depends heavily on the resolution of the boundary layer upstream of the point of separation. Cell Quality The quality of a cell has a crucial impact on the accuracy of the entire mesh. The quality of cell is analyzed by the virtue of three aspects: Orthogonal quality, Aspect ratio and Skewness. Orthogonal Quality: An important indicator of mesh quality is an entity referred to as the orthogonal quality. The worst cells will have an orthogonal quality close to 0 and the best cells will have an orthogonal quality closer to 1. Aspect Ratio: Aspect ratio is an important indicator of mesh quality. It is a measure of stretching of the cell. It is computed as the ratio of the maximum value to the minimum value of any of the following distances: the normal distances between the cell centroid and face centroids and the distances between the cell centroid and nodes. Skewness: Skewness can be defined as the difference between the shape of the cell and the shape of an equilateral cell of equivalent volume. Highly skewed cells can decrease accuracy and destabilize the solution. Smoothness Smoothness redirects to truncation error which is the difference between the partial derivatives in the equations and their discrete approximations. Rapid changes in cell volume between adjacent cells results in larger truncation errors. Smoothness can be improved by refining the mesh based on the change in cell volume or the gradient of cell volume. Flow-Field Dependency The entire effects of resolution, smoothness, and cell shape on the accuracy and stability of the solution process is dependent upon the flow field being simulated. For example, skewed cells can be acceptable in benign flow regions, but they can be very damaging in regions with strong flow gradients. Correct Mesh Size Mesh size stands out as one of the most common problems to an equation. The bigger elements yield bad results. On the other hand, smaller elements make computing so long that it takes a long amount of time to get any result. One might never really know where exactly is the mesh size is on the scale. It is important to consider chosen analysis for different mesh sizes. As smaller mesh means a significant amount of computing time, it is important to strike a balance between computing time and accuracy. Too coarse mesh leads to erroneous results. In places where big deformations/stresses/instabilities take place, reducing element sizes allow for greatly increased accuracy without great expense in computing time.
Read More