What are BREP and CSG | Difference between BREP and CSG
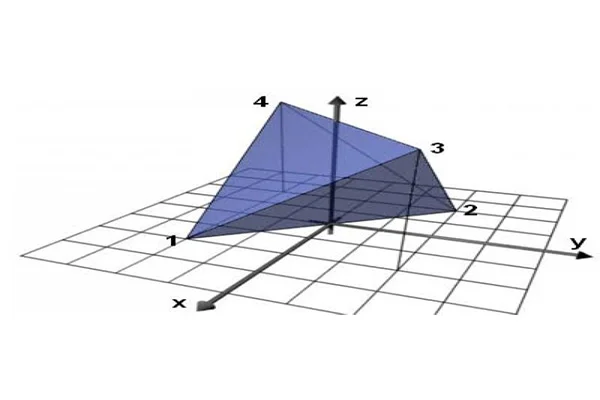
Table of Content Constructive Solid Geometry Boundary Representation Differences between BREP and CSG The geometric modeling technique has revolutionized the design and manufacture of products to a great extent. Although there have been various ways of representing an object, the most commonly used modeling technique is Solid Modelling. Boundary Representation modeling and Constructive Solid Geometry modeling are the two main ways to express solid models. Constructive Solid Geometry Constructive solid geometry or C-REP/CREP, previously known as computational binary solid geometry, is a reliable modeling technique that allows the creation of a complex object from simple primitives using Boolean operations. It is based on the fundamental that a physical object can be divided into a set of primitives or basic elements combined in a particular order by following a set of rules (Boolean operations) to create an object. Typically, they are objects of simple shapes such as cuboids, cylinders, prisms, pyramids, spheres, and cones. CSG cannot represent fillets, chamfers, and other context-based features. The primitives are considered valid CSG models, where each primitive is bounded by orientable surfaces (Half-spaces). These simple primitives are in generic form and must be confirmed by the user to be used in the design. The primitive may require scaling, translation, and rotation transformations to be assigned a coveted position. There are two kinds of CSG schemes: Primitive-based CSG: A popular CSG scheme based on bounded solid primitives, R-sets.Half-space-based CSG: This CSG scheme uses unbounded Half-spaces. Bounded solid primitives and their boundaries are considered composite half-spaces and the surfaces of the component half- spaces, respectively. Some attributes of CSG are as follows: Boundary Representation In solid modeling and computer-aided design, boundary representation or B-rep / BREP—is the process of representing shapes using the limits. Here a solid is described as a collection of connected surface elements. BREP was one of the first computer-generated representations to represent three- dimensional objects. BREP defines an object by its spatial boundaries. It details the points, edges, and surfaces of a volume. BREP can also be explained in terms of cell domain combination. A cell is a connected limitation of the underlying geometry. There are four kinds of cells as per the spatial dimension they inhabit: A domain is a set of connected cells grouped to define boundaries. Fields define various components inside a non-manifold object.Boundary representation of models consists of two kinds of information:Topology: The main topological entities are faces, edges, and vertices.Geometry: The main geometrical entities are surfaces, curves, and points. The topological and geometrical entities are intertwined in a way where: BREP comes with its share of advantages and disadvantages, which are: Differences between BREP and CSG Boundary Representation(BREP) Constructive Solid Geometry(CSG) BREP describes only the oriented surface of a solid as a data structure composed of vertices, edges, and faces. A solid is represented as a Boolean expression of primitive solid objects of a simpler structure. A BREP object is easily rendered on a graphic display system. A CSG object is always valid because its surface is closed and orientable and encloses a volume, provided the primitives are authentic in it. Basic operations include reviewing the possible surface types, the winged-edge representation schema, and the Euler operators for BREP. Basic operations include classifying points, curves, and surfaces concerning a solid, detecting redundancies in the representation, and approximating CSG objects systematically.
Read MoreFaceted Modeling and NURBS
Modern CAD systems and CAD packages enable designers to model objects and retrieve them in their formats. Some formats are interchangeable while some enforce restrictions, upon which, it becomes difficult to transfer an object model from one form to another. This article describes some of the most used CAD formats in the industry. But before we look into various CAD formats, it is essential to understand the concept of Faceted geometry and Analytic geometry (NURBS). FACETED GEOMETRY Faceted geometry, also known as discrete geometry, are models which consist of groups of polygons which is often triangles. Most Computer-Aided Design (CAD) systems typically use continuous surface and edge definitions based on NURBS. CAE simulations break down this NURBS representation into facets by a process known as meshing. The faceted models are quite appealing to engineering marketing, as such simulations are less bothered with exact physical reality and tend to emphasize on creating eye-catching visuals, such as airflow over a car, which can be incorporated into a marketing brochure. File formats typically used for faceted models are: .3ds, .dxf, .obj, .stl (Stereolithography). Almost all the faceted formats, except for STL, reflect material properties such as glass and metal by providing groupings of facets. However, such groupings are inadequate for a CAE simulation. ANALYTIC GEOMETRY (NURBS) NURBS or Non-uniform rational basis spline describes curves and surfaces with mathematical functions, and form the most common analytic geometry representations. The NURBS geometry has unlimited resolution. The NURBS definition defines the location of the boundary points and uses control points with slope definition to determine the internal shape of curves and surfaces, thereby enabling a great deal of flexibility. NURBS geometry is typically produced in CAD systems such as CATIA, Pro/Engineer, Solidworks, NX, etc. A significant drawback of NURBS geometry is that they are generally specific to the CAD packages that created them, and interchanging formats can be error-prone and inaccurate. DIFFERENCE BETWEEN FACETED GEOMETRY AND ANALYTIC GEOMETRY (NURBS) Faceted geometry NURBS geometry Facets are always guaranteed to comply with the original definition In NURBS geometry, different levels of model detail are created without losing fidelity Faceted geometry describes a shape as a mesh, points usually connected by triangles Analytic geometry defines curves and surfaces with mathematical functions Faceted geometry has limited resolution NURBS geometry has unlimited resolution Evaluating a faceted surface, one can get a shape defined by linear interpolation between known discrete points One can assess a NURBS surface anywhere and get coordinates lying on the surface Simple definition Includes topology Cons of Faceted geometry Cons of NURBS geometry Fixed resolution More computing intense No topology High data exchange Although faceted geometry has its use, NURBS geometry is superior for design and manufacturing processes. Due to the high demands on geometric precision, NURBS geometry finds its place in CAE applications. But if the modeling requirements ask for stunning visuals, faceted models are worth giving a try.
Read MoreWhat is Geometric Modeling
Table of Content Representation of Geometric Models Types of Geometric Modelings Requirements for Geometric Modeling The culture of design & manufacturing incorporates various crucial aspects for producing a market- efficient product. Computer-aided Engineering or CAE is a central part of the entire manufacturing process. Over the years, the function of CAE has evolved so much that it has developed its applications depending upon the type of usage and execution. Geometric Modeling happens to be one of the most popular CAE applications. Geometric Modeling is the computer/software-generated mathematical representation of an object’s geometry. It includes both graphical and non-graphical information. This information is stored in a database and displayed as a picture. It is then possible to edit and analyze the model in different ways. As curves are easy to manipulate and bend as per application, geometric modeling uses curves extensively to construct surfaces. The formation of curves can be achieved by – a set of points, analytic functions, or other curves/functions. The mathematical representation of an object can be displayed on a computer and used for the generation of drawings, which go on for analysis and eventual manufacturing of the object. In general, there are three conventional steps to creating a geometric model: Representation of Geometric Models There are two basic types of geometric models: a two-dimensional model, which is used for technical drawing, and a three-dimensional model, which is used for computer-aided design and manufacturing. Constructing a geometric model in CAD involves using a 3D computer program to describe geometric relationships and the physical extent of a component. The models may also contain material properties and other attributes of the element, such as the mass of the component. Many CAD programs can calculate a component’s mass properties and evaluate its other physical properties. These capabilities may be crucial for flexible and adaptive manufacturing lines. There are two main types of representations in geometric modeling. The classical presentation of geometric objects consists of geometric pointsets defined by boundaries. On the other hand, modern geometric modeling uses parametric families of pointsets. Parametric families are defined using geometric operation graphs, features, and constraints. In both cases, a user interacts with an example object from the family. It may also be a surface, a volume, or a solid. In addition to these models, geometric modeling can incorporate other design and manufacturing aspects. Computer- aided engineering, or CAE, is the central component of the manufacturing process. With the help of geometric modeling applications, key elements can be created, transformed, and integrated into the desired shape. In addition to this, CAD applications can also incorporate complex mathematical operations. Types of Geometric Modelings Depending upon the representations of objects, geometric modeling system can be classified into three categories, which are: Solid modelingSolid modeling also known as volume modeling, this is the most widely used method, providing a complete description of solid modeling. Solid modeling tools allow you to build many sides of an object at once. Solid models make multiple sides at once, reducing the ambiguity in surface modeling. Surface modelingSurface modeling is another popular method. This type of modeling represents the object by its surface and is used to describe the object with a clear view of manufacturing. This method uses surface geometry to create objects with complex forms. From this clear point of view, surface modeling cannot be used to develop an internal surface of any model. Surface modeling uses Bezier and B-spines. Surface modeling is better for design engineers as it organizes the edges that define polygonal surfaces. Wireframe modelingIt is a simple modeling system used to represent the object with the help of lines only. Hence, it is also known as Line model representation. However, wireframe modeling is not enough to express complex solids; therefore, it is used to describe only wiring systems. Wireframe geometric modeling is a good option for small-scale companies, where intricate surface details are essential for product design. Requirements for Geometric Modeling The various requirements of geometric modeling are as follows: Geometric modeling is a vast and elaborate field of CAE and requires in-depth study. The following articles dive deep into the various types and facets of geometric modeling.
Read MoreValue Engineering
During the lifecycle of a particular product, companies tend to review the existing design to look out for ways to reduce production cost. Even when coming up with a new product, so many manufacturers go for analyzing the same during its design phase so that it requires an optimum level of cost to produce. This is where Value Engineering comes in. Value engineering is an organized method to improve the “value” of a product or service in the lowest of cost. VE is a systematic approach aimed at obtaining the necessary functions in a product, process, or system at the minimum overall cost, thereby maintaining the quality, reliability, performance, and safety. It provides the substitution of materials and methods with less expensive alternatives, without jeopardizing the functionality. It is emphasized totally on the functions of various components and materials, rather than their physical characteristics. Value engineering is also called value analysis. It was Lawrence Miles who came up with the concept of finding substitute materials for parts unavailable. It was found that substitutions not only reduced cost but aided in a better-finished product. It was this new technique that evolved into value engineering today. The value in VE means two components: The function of a product is the specific task it was designed to perform, and the cost refers to the cost of the item during its life cycle. The ratio of function to cost denotes that the value of a product can be increased by either improving its function or decreasing its cost. In value engineering, the cost related to production, design, maintenance, and replacement are included in the analysis. If we take an example of a new tech product which is being designed and is slated to have a life cycle of only two years; the product will be designed with the least expensive materials and resources that will live up to the end of the product’s lifecycle, saving the manufacturer and the end-user money. This is how product value is improved by reducing costs. It is evident that with the increase in function value and decrease in price, the overall product value increases. Stages of Value Engineering There are three main stages to value engineering, which are: Benefits of Value Engineering Value engineering helps an organization in numerous ways: Value engineering concepts apply to business as well as technical situations and consequently lead management to informed, result-oriented decisions. Value engineering has to be treated as a future investment for gaining technology leadership in the industry.
Read MoreDesign Analysis – FEA, CFD, and Mold Flow Analysis
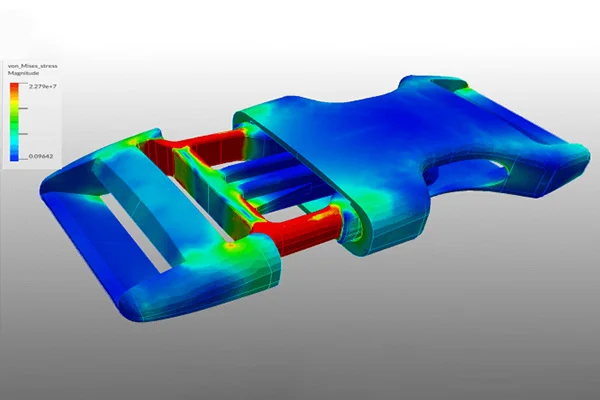
Table of content Finite Element Analysis (FEA) Computational Fluid Dynamics (CFD) Mold Flow Analysis Importance of CAE in design analysis Over the years, the term “Design Analysis” has been essential in the manufacturing sector. Instead of making a prototype and creating elaborate testing regimens to analyze the physical behavior of a product, engineers can evoke this information quickly and accurately on the computer. Design analysis is a specialized computer software technology designed to simulate the physical behavior of an object. If an object will break or deform or how it may react to heat are the sort of queries design analysis can answer. Design analysis helps in minimizing or even eliminating the need to build a physical prototype for testing. As a result, the technology has gone mainstream as a prized product development tool and found its presence in almost all engineering sectors. This article discusses three major design analysis software, namely: Finite Element Analysis (FEA) The Finite Element Analysis (FEA) is a specialized simulation of a physical entity using the numerical algorithm known as the Finite Element Method (FEM). It is used to reduce the number of physical prototypes and experiments and analyze objects in their design stage to develop better products faster. The term ‘finite’ denotes the limited, or finite, number of degrees of freedom used to model the behavior of each element. Mathematics is used to understand and quantify a physical phenomenon such as structural or fluid behavior, wave propagation, thermal transport, the growth of biological cells, etc. Most of these processes are described using Partial Differential Equations. Finite Element Analysis is one of the most prominent numerical techniques for a computer to solve these PEDs. FEA will analyze an object in question by breaking its entire geometry into small ‘elements,’ which are put under simulated conditions to see how the elements react. It displays the results as color- coded 3D images where red denotes an area of failure and blue indicates fields that maintain their integrity under the load applied. However, note down that FEA gives an approximate solution to the problem. FEA is used in problems where an analytical solution is not easily obtained, and mathematical expressions are required because of complex geometries, loadings, and material properties. Engineers also use FEA to reduce the number of physical prototypes, conduct failure investigations and improve component designs. It is also used by forensic engineers to determine stress concentrations in structures and to show alternative designs. Finite element analysis can help analyze fatigue-related failures. Finite element analysis has numerous other applications. Its advantages are many – it enables engineers to make better products faster. By breaking down a complex object into thousands or hundreds of thousands of finite elements, finite element analysis predicts how a given object will respond under a certain load. Furthermore, it helps forensic engineers confirm the stress concentrations in a case and show possible alternatives. FEA is also helpful for fatigue-related failure analysis. Computational Fluid Dynamics (CFD) Computational Fluid Dynamics (CFD) is a specialized simulation that analyzes fluid flows through an object using numerical solution methods. CFD incorporates applied mathematics, physics, and computing software to evaluate how a gas or liquid flows and how it affects an object as it flows past. CFD is based on Navier-Stokes equations which describe how a moving fluid’s velocity, temperature, pressure, and density are related. Aerodynamics and hydrodynamics are two engineering streams where CFD analyses are often used. Physical quantities such as lift and drag or field properties as pressures and velocities are computed using CFD. Fluid dynamics is connected with physical laws in the form of partial differential equations. Engineers transform these laws into algebraical equations and can efficiently solve these equations numerically. The CFD analysis reliability depends on the whole structure of the process. Determining proper numerical methods to develop a pathway through the solution is highly important. The software which conducts the analysis is one of the key elements in generating a sustainable product development process, as the number of physical prototypes can be reduced drastically. CFD is used in almost all industrial domains, such as: With the help of CFD, fluid flow can be analyzed faster in more detail at an earlier stage than by testing, at a lower cost and risk. CFD solves the fundamental equations governing fluid flow processes and provides information on essential flow characteristics such as pressure loss, flow distribution, and mixing rates. CFD injection molding is a widely used manufacturing process for plastic components. It has undergone many improvements over the past few decades, and numerical simulation models enable mold and part design without costly experiments. CFD has become an integral part of the engineering and design domains of prominent companies due to its ability to predict performance of new designs and intends to remain so. Mold Flow Analysis Moldflow, formerly known as C-mould, is one of the leading software used in processwide plastics solutions. Mold flow computes the injection molding process where plastic flows into a mold and analyzes the given mold design to check how the parts react to injection and ensure that the mold will be able to produce the strongest and uniform pieces. Using mold flow analysis, a manufacturer can reduce stress levels in its mold and increase filling and product quality. By assessing the flow of the plastic melt, Mold Flow can make informed design decisions and avoid costly mistakes. This software is an invaluable tool to improve quality and increase productivity. This software is beneficial for manufacturers that need to predict the flow of a mold and determine its feasibility. Two of the most popular mold flow analysis software are Moldflow and Moldex3D, used exclusively by many mold makers. There are three types of Mold flow analysis which are as follows: To simulate mold flow, a network of rectangular elements is discretized on the mold. The corresponding velocity field is then used to calculate the flow of the melt. A two-stage predictor- corrector method, developed by Hieber and Shen, has been used since then. Mold makers typically use the software
Read MoreGeometric Dimensioning and Tolerancing (GD&T)
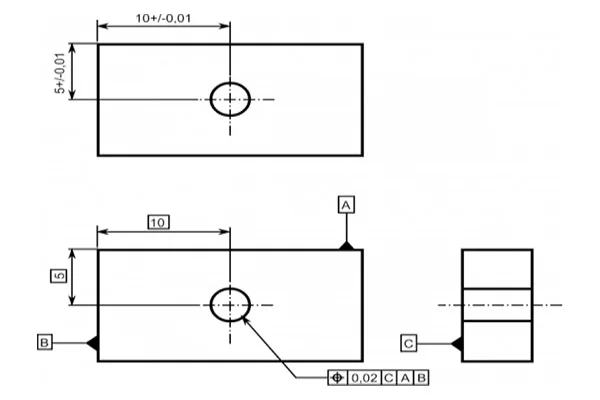
The design model is a depiction of a part design. However, the design model can never be an accurate representation of the product itself. Due to shortcomings in manufacturing and inspection processes, physical parts never match the design model exactly. An essential aspect of a design is to specify the lengths the part features may deviate from their theoretically accurate geometry. It is vital that the design intent and functionality of the part be communicated between the design engineers and the manufacturing unit. It is where the approach of GD&T comes into play. Geometric dimensioning and tolerancing or GD&T is a language of symbols and standards used on engineering drawings and models to determine the allowable deviation of feature geometry. GD&T consists of dimensions, tolerances, definitions, symbols, and rules that enable the design engineers to convey the design models appropriately. The manufacturing unit uses the language to understand the design intent. To master GD&T, one needs to understand the crucial concepts, which includes: GD&T is an efficient way to describe the dimensions and tolerances compared to traditional approximation tolerancing. The engineer might design a part with perfect geometry in CAD, but the produced part, more often than not, turns out to be not accurate. Proper use of GD&T improves quality and reduce time and cost of delivery by providing a common language for expressing design intent.
Read MoreWhat are DFMA and DFMEA
Table of content Design for Manufacturing and Assembly (DFMA) Design Failure Mode and Effect Analysis (DFMEA) During the last few decades, manufacturers have been able to source parts globally with the developments in technology. More and more manufacturers have entered the competition as it grows fierce. Companies in developing nation markets offer products at lower prices. To sustain business and achieve growth, many manufacturers are developing new products to cater to the consumers and widen it. They must be very marketable and of high quality. The Design for Manufacturing and Assembly (DFMA) method enables firms to develop quality products in lesser time and at lower production costs. Design for Manufacturing and Assembly (DFMA) Design for Manufacturing and Assembly or DFMA is a design process that targets ease of manufacturing and assembly efficiency. Simplifying the design of a product makes it possible to manufacture and assemble it in the minimum time and lower cost. DFMA approach has been used in the automotive and industrial sectors mainly. However, the process has been adopted in the construction domain as well. DFMA is a combination of two methodologies which are: DFM and DFA seek to reduce material and labor costs associated with designing and manufacturing a product. For a successful application of DFMA, the two activities should operate in unison to earn the most significant benefit. Through the DFMA approach, a company can prevent, detect, quantify, and eliminate waste and manufacturing inefficiency within a product design. Design Failure Mode and Effect Analysis (DFMEA) Design Failure Mode and Effect Analysis (DFMEA) is a systematic string of activities to identify and analyze potential systems, products, or process failures. Design Failure Mode and Effects Analysis or DFMEA focuses on finding potential design flaws and failures of components before they can significantly impact the end users of a product and the business distributing the product. The design failure mode and effect analysis – DFMEA is an ideal process for any sector where risk reduction and failure prevention are crucial, which includes: With expertise in advanced engineering, Prescient Technologies ensures maximum benefit to their client in terms of value addition, weight reduction, material selection, cost reduction, or manufacturing process selection. Visit our website for more details or send a message.
Read MoreProduct Tear Down Analysis
Table of content What is a product teardown? Material Selection Responsibilities of a product teardown team Pre-requisites for a product teardown workshop Length of a product teardown workshop Knowledge and product improvement How do you determine procurement costs for product design, materials, and specifications? A superb way to get valuable insights and pinpoint design improvement and cost reduction opportunities is through a product teardown analysis. What is a product teardown? In simple words, the process of disassembling a part to understand how its construction and its functionalities are known as product teardown. This technique helps companies understand their products’ components, manufacturing processes, and cost structures. These data can then be used to develop new concepts. A product teardown process is an orderly way to know about a particular product and identify its parts and system functionality to recognize modeling improvement and cost reduction opportunities. Unlike the traditional costing method, teardown analysis collects information to determine product quality and price desired by the consumers. Companies can understand their competitor’s product, on what ground it differs from their own, and the manufacturing cost associated. The three primary reasons for a product teardown analysis are: Breakdown and Analysis It involves understanding the current technology, functionalities, and components of a product, identifying its strengths and weaknesses, and establishing areas for improvement. Benchmarking Benchmarking establishes a baseline in terms of understanding and representation of the product. It provides a comparison of new conceptual designs. Knowledge and product improvement It involves gaining engineering knowledge to enact new room for concept development. The entire product teardown process can be summed up in five steps: The product teardown study technique has proven to be suitable for obtaining crucial data about the manufacturing method, components, build-up model, functionality, and competitors’ strategies to improve and come up with a more refined version of a product. Material Selection Material selection stands out to be one of the most crucial aspects of engineering design as it determines the design’s reliability in terms of industrial and economic viewpoints. A great design needs appropriate material combinations, or it will fail to be a profitable product. Engineers need to choose the best materials for the same, and there are several criteria they rely upon, such as property and its reaction to given conditions. Some important points to be included are: Mechanical properties: A design needs to go through various manufacturing practices depending on the material. The primary goal is to prevent the failure of the product from a material viewpoint and ensure service fit. The materials are subject to stress, load, strength, and temperature variations. Wear of materials: Most of the time, chances are that materials are contacting each other in a product. It can be seen in the case of gears. The selected materials should be able to withstand wear and tear. Corrosion: This is a condition where the importance of material selection can be witnessed the most. It is evident in products open to the environment for an extended period. Materials like iron are highly prone to corrosion. So it is essential to make that the material is corrosion-resistant and capable of being used for the product. Manufacturing: Although the material is fit to be used for a product, it has to be appropriate for the manufacturing process. Improper machining can lead to a faulty product, and incorrect machining stems from an inability to put manufacturing functions of materials. Cost: Cost is a crucial fact to consider while selecting materials. Certain metals are rare to obtain, considering their availability and lengthy refining process. Although the cost factor can be neglected when performance is given priority, overall associated costs should be considered. There is a reason why plastics have massively replaced metals in the manufacturing process. Responsibilities of a product teardown team The responsibilities of a product teardown team can vary widely depending on the company and the type of product. Some of the most important goals of a product teardown team include: assessing the total cost of manufacturing the product and determining general overhead costs. Other team members’ duties may involve reducing labor and material costs and identifying areas for improvement. Often, a product teardown team will also be responsible for establishing benchmarks and determining where improvements can be made. The product teardown team also consists of people with extensive experience in the industry. This team will help startups evaluate their products and identify critical areas for improvement. By taking apart products, they’ll learn the process that goes into the design of each product and provide evidence-based recommendations to improve its structure. Pre-requisites for a product teardown workshop There are several different product teardown workshops, including the Japanese style, which has been used successfully in Japan since the 1970s. Every major Japanese corporation has adopted this style of workshop. Most western teardown methods focus on visual displays and lack a detailed analysis of products. In contrast, the Japanese process forces participants to examine the product in detail and compare it to its competitors. Marketers and design executives can use the results of this workshop to improve their products. Before you conduct a product teardown workshop, you must be sure to secure your products. If the products are your competitors, you will need to carry out rigorous non-destructive performance testing. Your workshop should also include data recording. Depending on the nature of the workshop, the requirements may vary from one client to the next. Length of a product teardown workshop The duration of a product teardown workshop will depend on the nature of the item being analyzed. Some workshops are as long as four days, while others are shorter, depending on the client’s needs. Participants will learn about all teardown methods and how to implement them in a team workshop setting. Often, these workshops include hands-on, creative teardown of products. But the exact length of a product teardown workshop depends on the number of participants and the types of products they are analyzing. To maximize the workshop’s effectiveness, make sure participants are aware
Read MoreTypes of Jigs and Fixtures
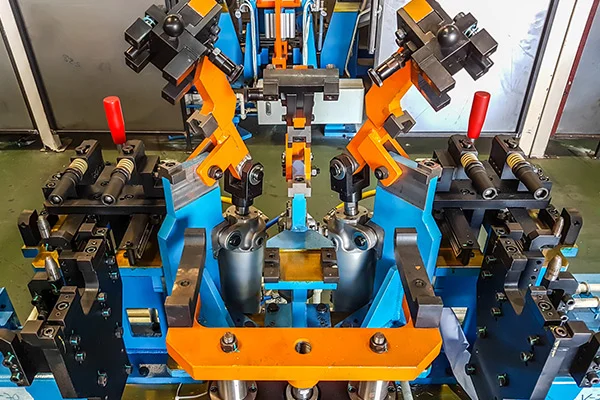
Table of content Types of Jigs Types of Fixtures We know that jigs and fixtures are the devices that help in the machining of jobs and reduce the human efforts required for producing these parts. It has been explained why a center lathe is an ideal machine tool for creating individual pieces of different shapes and sizes. Still, for manufacturing similar objects in high numbers, its use is not economical. Different objects may require drilling, milling, planing, grinding machines, etc. Specific tools are necessary for producing these objects in identical shapes and sizes on a mass scale by holding and locating tasks to minimize the repetition work. That is when various types of jigs and fixtures come into play. Considering the variety in the nature of jobs to be machined, the quality, and the associated functions, the type of jig and fixture varies. Following are the various kinds of jigs and fixtures. Types of Jigs Template Jig: The template jig is the simplest of all the models. The plate, having two holes, acts as a template fixed on the component to be machined. The drill is guided through these template holes, and the required holes are drilled on the workpiece at the same relative positions as on the template. Plate Jig: A plate jig improves the template jig by incorporating drill bushes on the template. The plate jig is employed to drill holes on large parts, maintaining accurate spacing with each other. Channel Jig: Channel jig is a simple type of jig having a channel-like cross-section. The component is fitted within the channel and is located and clamped by rotating the knurled knob. The tool is guided through the drill bush. Diameter Jig: A diameter jig is used to drill radial holes on a cylindrical or spherical workpiece. Leaf Jig: The leaf jig has a leaf that may be swung open or closed on the work for loading or loading purposes. Ring Jig: Ring jig is employed to drill holes on circular flanged parts. The work is securely clamped on the drill body, and the holes are drilled by guiding the tool through drill bushes. Box Jig: Box jig is of box-like construction within which the work is rigidly held so that it can be drilled or machined from different angles at a single setting depending on which face of the jig is turned toward the tool. Ensure top notch tool & fixture design Our team of experts having knowledge of various manufacturing processes enables them to design & develop high precision tools without any impact on required shape/profile. Visit our website for more details. Types of Fixtures Turning Fixtures: These fixtures are generally mounted on the nose of the machine spindle or a faceplate, and the workpieces hold them. The fixture may have to be provided with a counterweight or balance the unbalance fixture whenever necessary. Milling Fixtures: Milling fixtures are typically mounted on the nose of the machine spindle or a faceplate, and the workpieces hold them. The table is shifted and set in the proper position about the cutter. The workpieces are located in the base of the fixture and clamped before starting the operation. Broaching Fixtures: Broaching fixtures are used on different broaching machines to locate, hold and support the workpieces during the operations, such as keyway broaching operations, such as keyway broaching, hole broaching, etc. Indexing Fixtures: Several components need machining on different surfaces such that their machined surface surfaces or forms are evenly spaced. Such elements must be indexed equally as many as the number of surfaces to be machined. The holding devices (jigs or fixtures) used are made to carry a suitable indexing mechanism. A fixture having such a device is known as an indexing fixture. Grinding Fixtures: These fixtures may be the standard work-holding devices, such as chucks, mandrels, chuck with shaped jaws, magnetic chucks, etc. For external surface grinding, cylindrical grinding utilizes plain or tapered mandrels. The workpiece is located and held on the mandrel with the help of the bore so that the external surface may be machined truly concentric to the bore. For internal grinding, the chuck is the most standard fixture. For holding irregularly shaped components, the fixture is designed the same as turning or boring fixtures. Boring Fixtures: This fixture incorporates almost all the prevailing principles of jig and fixture design; their construction need not be as sturdy as that of the milling fixtures because they never have to bear as heavy cutting loads as involved in milling fixtures because they never have to endure as heavy cutting loads as involved in milling operations. Tapping Fixtures: Tapping fixtures are specially designed to position and firmly secure identical workpieces to cut internal threads in drilled holes. Odd-shaped and unbalanced components will always need such fixtures, especially when the tapping operation is to be carried out repeatedly on a mass scale on such parts. Duplex Fixtures: It is the name given to the fixture which holds two similar components simultaneously and facilitates simultaneously machining of these components at two separate stations. Welding Fixtures: Welding fixtures are carefully designed to hold and support the various components welded in proper locations and prevent distortions in welded structures. For this, the locating element needs to be careful; clamping has to be light but firm, and the placement of clamping elements has to be clear of the welding area. The fixture must be pretty stable and rigid to withstand the welding stresses. Assembly Fixtures: The function of these fixtures is to hold different components together in their proper relative position when assembling them. Source:The Engineers post, https://www.theengineerspost.com/jigs-and-fixturesJigs & Fixtures with differences, Types of Jigs & Fixtures and Constructional details of Jigs & Fixtures, Mechtalk
Read MoreDesigning Jigs and Fixtures
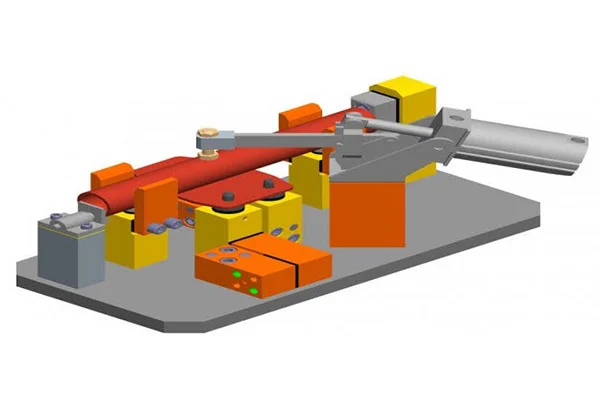
The design of jigs and fixtures is dependent on numerous factors which are analysed to achieve optimum output. Jigs should be made of rigid light materials to facilitate secure handling, as it has to be rotated severally to enable holes to be drilled from different angles. It is recommended that four feet should be provided for jigs that are not bolted on the machine tool, to enable the jig to wobble if not well positioned on the table and thereby alert the operator. Drill jigs provide procedures for proper location of the work-piece concerning the cutting tool, tightly clamp and rigidly support the work-piece during machining, and also guide the tool position and fasten the jig on the machine tool. To achieve their expected objectives, jigs and fixtures consist of many elements: The factors below are to be reflected upon during design, production, and assembly of jigs and fixtures due to the targeted increase in throughput, quality of products, interchangeability, and more accuracy. Elements of Jigs and Fixtures The significant features of Jigs and Fixtures are: The body: The body is the most outstanding element of jigs and fixtures. It is constructed by welding of different slabs and metals. After the fabrication, it is often heat-treated for stress reduction as its main objective is to accommodate and support the job. Clamping devices: The clamping devices must be straightforward and easy to operate, without sacrificing efficiency and effectiveness. Apart from holding the work-piece firmly in place, the clamping devices are capable of withholding the strain of the cutting tool during operations. The need for clamping the work-piece on the jig or fixture is to apply pressure and press it against the locating components, thereby fastening it in the right position for the cutting tools. Locating devices: Thepin is the most popular device applied for the location of work-piece in jigs and fixtures.The pin’s shank is press-fitted or driven into a jig or fixture. The locating width of the pin is made bigger than the shank to stop it from being pressed into the jig or fixture body because of the weight of the cutting tools or work-piece. It is made with hardened steel. Jig bushing or tool guide:Guiding parts like jig bushings and templates are used to locate the cutting tool relative to the component being machined. Jig bushes are applied in drilling and boring, which must be wear resistant, interchangeable, and precise. Bushes are mainly made of a reliable grade of tool steel to ensure hardening at a low temperature and also reduce the risk of fire crackling. Selection of Materials There is a wide range of materials from where jigs and fixtures could be made, to resist tear and wear, the materials are often tempered and hardened. Also, phosphor bronze and other non-ferrous metals, as well as composites, and nylons for wear reduction of the mating parts, and damage prevention to the manufacturing part is used. Some of the materials are discussed below: Other materials for the making of jigs and fixtures include Nylon and Fibre, steel castings, stainless steel, cast iron, high tensile steels, case hardening steels, and spring steels. Reference Charles ChikwenduOkpala, EzeanyimOkechukwu C “The Design and Need for Jigs and Fixtures in Manufacturing” Science Research.Vol. 3, No. 4, 2015, pp. 213-219. DOI: 10.11648/j.sr.20150304.19
Read More