What are BREP and CSG | Difference between BREP and CSG
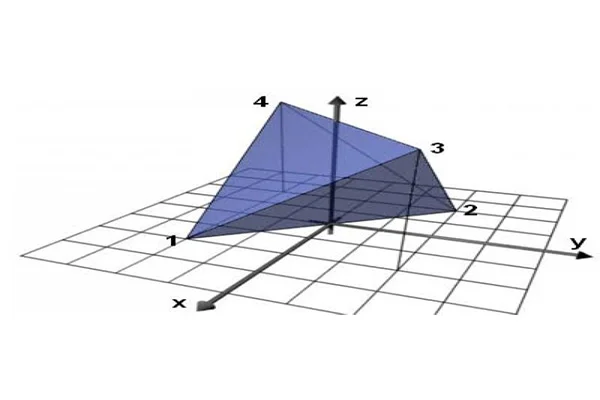
Table of Content Constructive Solid Geometry Boundary Representation Differences between BREP and CSG The geometric modeling technique has revolutionized the design and manufacture of products to a great extent. Although there have been various ways of representing an object, the most commonly used modeling technique is Solid Modelling. Boundary Representation modeling and Constructive Solid Geometry modeling are the two main ways to express solid models. Constructive Solid Geometry Constructive solid geometry or C-REP/CREP, previously known as computational binary solid geometry, is a reliable modeling technique that allows the creation of a complex object from simple primitives using Boolean operations. It is based on the fundamental that a physical object can be divided into a set of primitives or basic elements combined in a particular order by following a set of rules (Boolean operations) to create an object. Typically, they are objects of simple shapes such as cuboids, cylinders, prisms, pyramids, spheres, and cones. CSG cannot represent fillets, chamfers, and other context-based features. The primitives are considered valid CSG models, where each primitive is bounded by orientable surfaces (Half-spaces). These simple primitives are in generic form and must be confirmed by the user to be used in the design. The primitive may require scaling, translation, and rotation transformations to be assigned a coveted position. There are two kinds of CSG schemes: Primitive-based CSG: A popular CSG scheme based on bounded solid primitives, R-sets.Half-space-based CSG: This CSG scheme uses unbounded Half-spaces. Bounded solid primitives and their boundaries are considered composite half-spaces and the surfaces of the component half- spaces, respectively. Some attributes of CSG are as follows: Boundary Representation In solid modeling and computer-aided design, boundary representation or B-rep / BREP—is the process of representing shapes using the limits. Here a solid is described as a collection of connected surface elements. BREP was one of the first computer-generated representations to represent three- dimensional objects. BREP defines an object by its spatial boundaries. It details the points, edges, and surfaces of a volume. BREP can also be explained in terms of cell domain combination. A cell is a connected limitation of the underlying geometry. There are four kinds of cells as per the spatial dimension they inhabit: A domain is a set of connected cells grouped to define boundaries. Fields define various components inside a non-manifold object.Boundary representation of models consists of two kinds of information:Topology: The main topological entities are faces, edges, and vertices.Geometry: The main geometrical entities are surfaces, curves, and points. The topological and geometrical entities are intertwined in a way where: BREP comes with its share of advantages and disadvantages, which are: Differences between BREP and CSG Boundary Representation(BREP) Constructive Solid Geometry(CSG) BREP describes only the oriented surface of a solid as a data structure composed of vertices, edges, and faces. A solid is represented as a Boolean expression of primitive solid objects of a simpler structure. A BREP object is easily rendered on a graphic display system. A CSG object is always valid because its surface is closed and orientable and encloses a volume, provided the primitives are authentic in it. Basic operations include reviewing the possible surface types, the winged-edge representation schema, and the Euler operators for BREP. Basic operations include classifying points, curves, and surfaces concerning a solid, detecting redundancies in the representation, and approximating CSG objects systematically.
Read MoreFaceted Modeling and NURBS
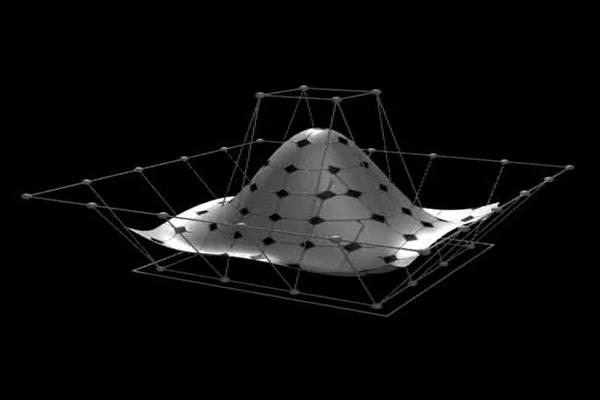
Modern CAD systems and CAD packages enable designers to model objects and retrieve them in their formats. Some formats are interchangeable while some enforce restrictions, upon which, it becomes difficult to transfer an object model from one form to another. This article describes some of the most used CAD formats in the industry. But before we look into various CAD formats, it is essential to understand the concept of Faceted geometry and Analytic geometry (NURBS). FACETED GEOMETRY Faceted geometry, also known as discrete geometry, are models which consist of groups of polygons which is often triangles. Most Computer-Aided Design (CAD) systems typically use continuous surface and edge definitions based on NURBS. CAE simulations break down this NURBS representation into facets by a process known as meshing. The faceted models are quite appealing to engineering marketing, as such simulations are less bothered with exact physical reality and tend to emphasize on creating eye-catching visuals, such as airflow over a car, which can be incorporated into a marketing brochure. File formats typically used for faceted models are: .3ds, .dxf, .obj, .stl (Stereolithography). Almost all the faceted formats, except for STL, reflect material properties such as glass and metal by providing groupings of facets. However, such groupings are inadequate for a CAE simulation. ANALYTIC GEOMETRY (NURBS) NURBS or Non-uniform rational basis spline describes curves and surfaces with mathematical functions, and form the most common analytic geometry representations. The NURBS geometry has unlimited resolution. The NURBS definition defines the location of the boundary points and uses control points with slope definition to determine the internal shape of curves and surfaces, thereby enabling a great deal of flexibility. NURBS geometry is typically produced in CAD systems such as CATIA, Pro/Engineer, Solidworks, NX, etc. A significant drawback of NURBS geometry is that they are generally specific to the CAD packages that created them, and interchanging formats can be error-prone and inaccurate. DIFFERENCE BETWEEN FACETED GEOMETRY AND ANALYTIC GEOMETRY (NURBS) Faceted geometry NURBS geometry Facets are always guaranteed to comply with the original definition In NURBS geometry, different levels of model detail are created without losing fidelity Faceted geometry describes a shape as a mesh, points usually connected by triangles Analytic geometry defines curves and surfaces with mathematical functions Faceted geometry has limited resolution NURBS geometry has unlimited resolution Evaluating a faceted surface, one can get a shape defined by linear interpolation between known discrete points One can assess a NURBS surface anywhere and get coordinates lying on the surface Simple definition Includes topology Cons of Faceted geometry Cons of NURBS geometry Fixed resolution More computing intense No topology High data exchange Although faceted geometry has its use, NURBS geometry is superior for design and manufacturing processes. Due to the high demands on geometric precision, NURBS geometry finds its place in CAE applications. But if the modeling requirements ask for stunning visuals, faceted models are worth giving a try.
Read MoreGeometric Dimensioning and Tolerancing (GD&T)
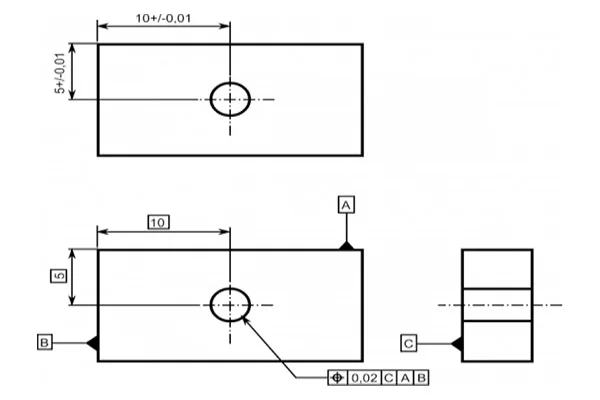
The design model is a depiction of a part design. However, the design model can never be an accurate representation of the product itself. Due to shortcomings in manufacturing and inspection processes, physical parts never match the design model exactly. An essential aspect of a design is to specify the lengths the part features may deviate from their theoretically accurate geometry. It is vital that the design intent and functionality of the part be communicated between the design engineers and the manufacturing unit. It is where the approach of GD&T comes into play. Geometric dimensioning and tolerancing or GD&T is a language of symbols and standards used on engineering drawings and models to determine the allowable deviation of feature geometry. GD&T consists of dimensions, tolerances, definitions, symbols, and rules that enable the design engineers to convey the design models appropriately. The manufacturing unit uses the language to understand the design intent. To master GD&T, one needs to understand the crucial concepts, which includes: GD&T is an efficient way to describe the dimensions and tolerances compared to traditional approximation tolerancing. The engineer might design a part with perfect geometry in CAD, but the produced part, more often than not, turns out to be not accurate. Proper use of GD&T improves quality and reduce time and cost of delivery by providing a common language for expressing design intent.
Read More

